


Overview
The Webhook action in Groundhogg enables seamless communication with external software or other Groundhogg instances on different websites. By sending data to a specified URL, this action allows you to integrate your flows with third-party applications, automate cross-platform tasks, and enhance your workflow capabilities. Available with the Advanced Features addon, it supports multiple HTTP methods and payload formats for flexible integration.
Extension Required!
The Webhook Actionis available with the Advanced Features addon. It can be purchased separately or as part of the Agency, Pro or Plus Plans.
When to Use
Use the Webhook action when you need to:
- Automate data transfer to services that accept webhook payloads, such as Zapier or custom endpoints.
- Send contact data to external platforms like CRMs, analytics tools, or custom APIs.
- Trigger actions in other applications based on flow events (e.g., form submissions or tag applications).
- Connect multiple Groundhogg installations across different websites.
How It Works
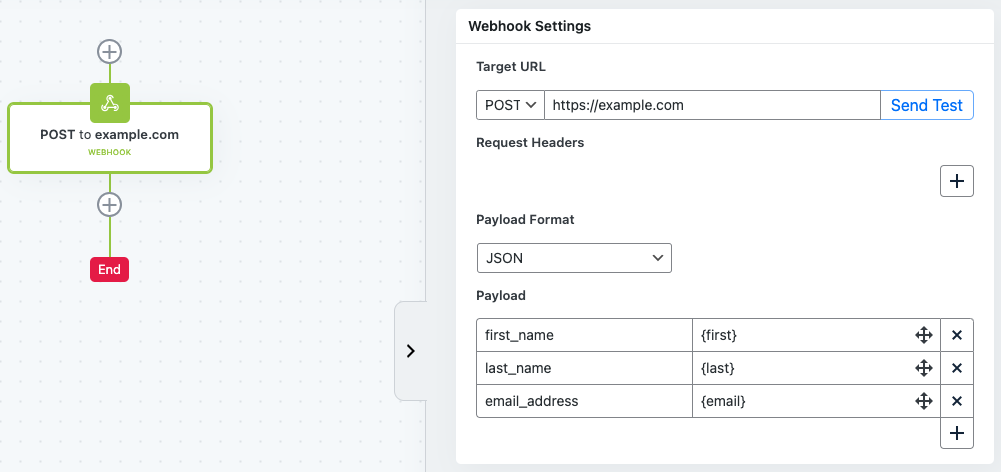
The Webhook action sends an HTTP request (POST, PUT, PATCH, GET, or DELETE) to a specified Target URL when a contact reaches this step in the flow. You can customize the request with headers and a payload, which can include contact-specific data using replacement codes (e.g., {first_name}, {email}). The payload can be formatted as x-www-form-urlencoded or JSON, depending on the receiving application’s requirements. A “Send Test” feature allows you to validate the webhook setup, and activity is logged in the Groundhogg Activity log for tracking.
Setup Instructions
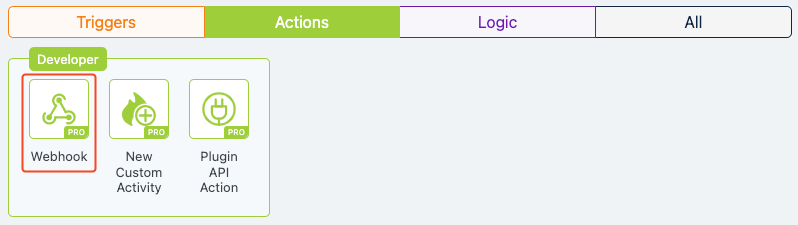
- Add the Action to Your Flow:
- Configure the Target URL:
- Select the HTTP method (POST, PUT, PATCH, GET, or DELETE) from the dropdown.
- Enter the Target URL where the webhook data will be sent.
- Use the “Send Test” button to verify connectivity with the endpoint.
- Set Request Headers (Optional):
- Click the “+” button to add headers.
- Enter the header name (e.g., Authorization) and its value (e.g., Bearer your_token).
- Add multiple headers as needed for authentication or metadata.
- Choose Payload Format:
- Select either x-www-form-urlencoded or JSON from the dropdown, based on the receiving application’s requirements.
- Define the Payload:
- Click the “+” button to add key-value pairs.
- Enter the key (e.g., first_name) and value (e.g., {first_name} to dynamically insert the contact’s first name).
- Add multiple payload fields to include additional data like {email}, {last_name}, or custom metadata ({meta.data}).
- Save and Publish:
- Review your settings and click “Publish Changes” to save the webhook configuration.
- Test the flow to ensure the webhook triggers correctly.
- Monitor Activity:
- Check the Activity log to confirm the webhook executed successfully.
- Note: The Webhook action requires the Advanced Features addon, available separately or with Agency, Pro, or Plus Plans.
Example Use Case
Imagine you run an e-commerce store using Groundhogg and want to sync new customer data with an external CRM. You create a flow that triggers when a contact submits a purchase form, applying a “Customer” tag. You add a Webhook action to send the contact’s details to your CRM’s API. The webhook uses a POST request to https://crm.example.com/api/add-contact, with a JSON payload containing {first_name}, {last_name}, and {email}. When a contact like “John Smith” completes a purchase, the webhook sends his data to the CRM, automatically creating a new contact record for your sales team to follow up, streamlining your customer management process.
FAQs / Troubleshooting
Q: Why isn’t my webhook firing?
A: Ensure the Target URL is correct and accessible. Use the “Send Test” button to validate connectivity. Check the Activity log for errors and verify that the flow is active.
Q: Can I send custom data in the payload?
A: Yes, use replacement codes to include contact data or metadata (e.g., {meta.custom_field}).
Q: What if the receiving application requires authentication?
A: Add authentication details in the Request Headers (e.g., Authorization: Bearer your_token) or as part of the payload, depending on the application’s requirements.
Q: Is the Webhook action available in all Groundhogg plans?
A: No, it requires the Advanced Features addon, included in Agency, Pro, or Plus Plans or purchased separately.
Q: How can I test my webhook setup?
A: Use https://webhook.site/ to generate a test URL and inspect the received payload. Alternatively, use the “Send Test” button in the webhook settings.
Was this helpful?
Let us know if this document answered your question. That’s the only way we can improve.