


White Labeling allows you to customize the Groundhogg admin experience to match your own brand. Replace the default Groundhogg logos, colors, and branding elements with your own to create a seamless experience for your clients or team members.
Available only as part of the Agency License.
Setting up a White Label install
To white label a Groundhogg installation, you must first install Groundhogg and then install the white label add-on which can be downloaded from your account.
Once installed, activate the White Label plugin from the plugins screen.
Only the user that activates the white label plugin can enable/disable it and modify it’s settings! That way other administrators on the site will only be aware of the white labeled version of the plugin.
White Label Settings
Once activated, go to Groundhogg >> Settings >> White Label to start configuring your branding settings.
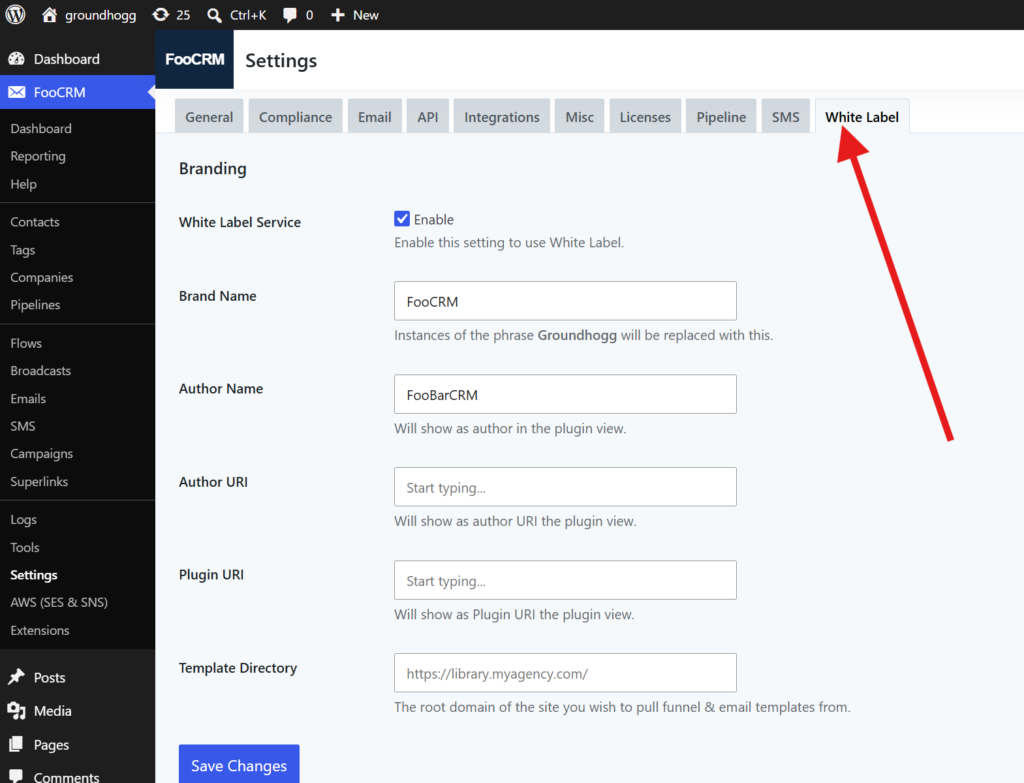
You will be able to change…
- Brand Name
Instances of the word “Groundhogg” will be replaced with the given brand name. Also the any Groundhogg logos and icons. - Author Name
Will modify the author in the plugins list. - Author URI
Will modify URLs in the plugins list. - Plugin URI
Will modify URLs in the plugins list.
Finally, once you’ve configured those settings you can enable the White Label Service setting to turn on the white label feature.
What’s different in white labelled installs
The following dashboard widgets and items are removed
- Helpful links
- Notifications
- Some branded recommendations
The Groundhogg >> Help admin screen becomes available to only the white label installer.
The admin page header icon icon is replaced with the new brand name.
The admin toolbar widget icon is replaced with the new brand name.
Licensing and other branded notices are removed or only shown to the white label installer.
Usage of the word mark “Groundhogg” is replaced with “brand name”.
What stays the same in white labelled installs
Colors are determined by the WordPress admin theme, so those will not change.
Links to help and support documents may persist. Sorry, there is currently no white label version of those.
Terminology (Flows, Triggers, Broadcasts, etc…) remains the same, unless you decide to translate it.
Branding related to any 3rd party plugins will remain. WooCommerce, GiveWP, LearnDash, Ninja Forms, etc…
Email and flow templates, unless you set up a custom template library (details below).
Configure a Custom Template Library
If you want to provide your white labelled sites with your own email and flow templates you must create a new site to be a template library for those other sites.
You will need to create a fresh WordPress site and install Groundhogg and any add-ons and integrations you would typically use so that you can access additional email blocks and flow step types.
Then, add the following to your wp-config.php file.
<?php

define( 'IS_GROUNDHOGG_TEMPLATE_SITE', true );
This will tell Groundhogg that you’re using this site to create and distribute templates.
Creating Email Templates
To create a downloadable email template, first create a new email, and when you’re happy with it toggle the Show in templates setting and publish the email.
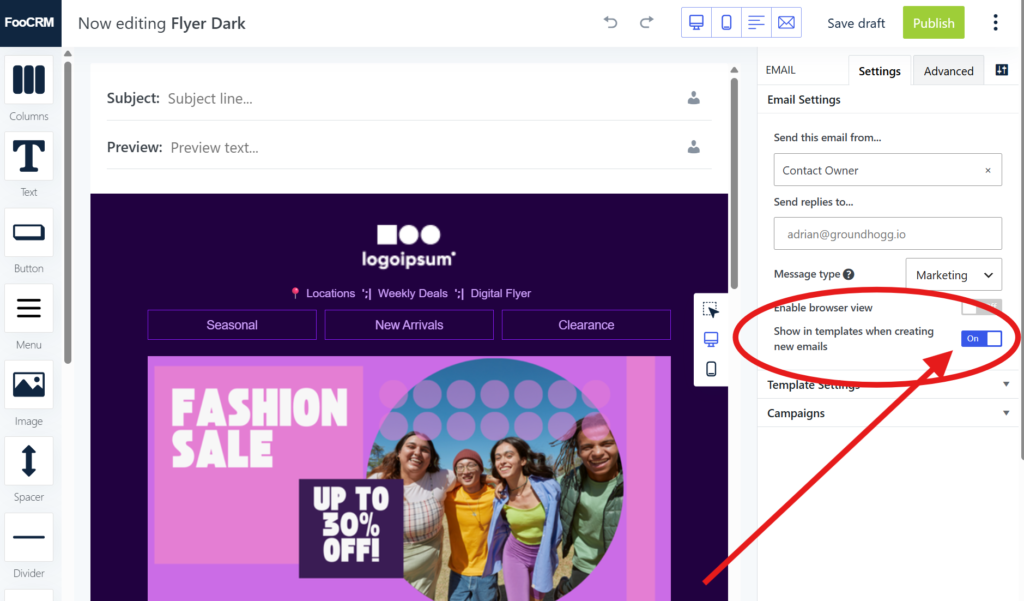
Only published/ready emails with the show in templates setting on will be shown in the templates screen.
Creating Flow Templates
To create a new flow template, create a flow and activate it. Any active flows on the library site will be available for download in your client sites.
Only published (saved) steps will be downloaded, so you can make changes to an active flow without clients downloading them.
You can add a description of your flow by editing the flow settings, which will be visible in the template selection screen.
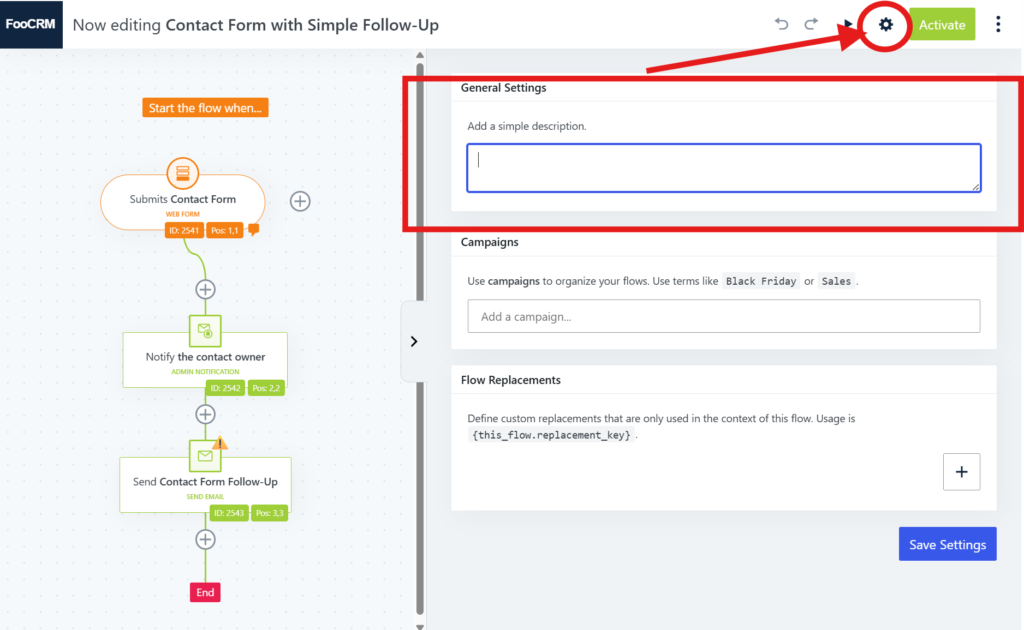
Any campaigns assigned to the flow will be available for filtering in the template selection screen.
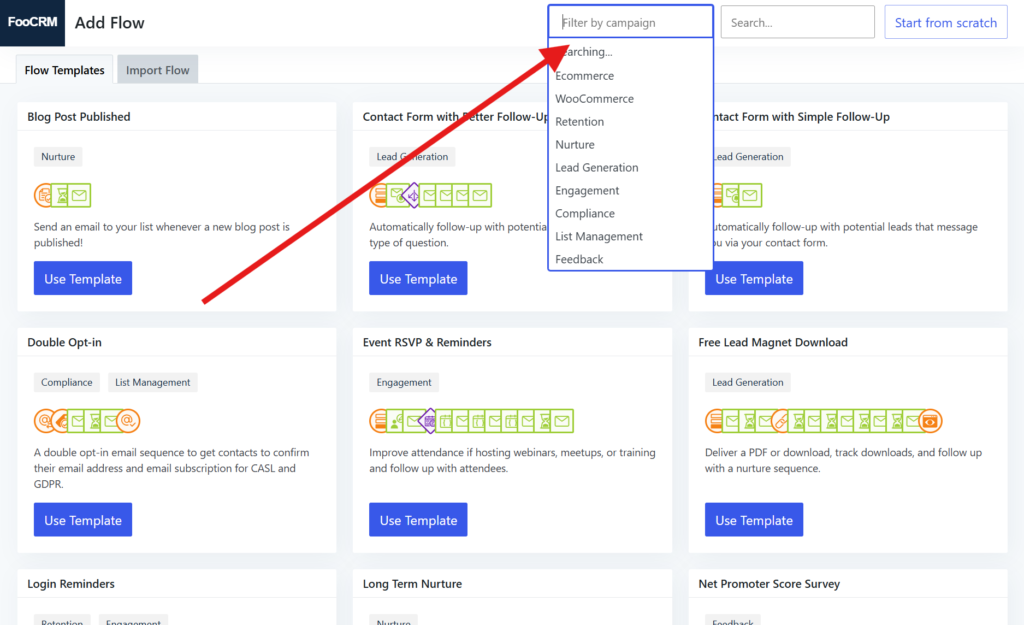
Changing the default library to your custom library
Once you’ve created your templates and have set the IS_GROUNDHOGG_TEMPLATE_SITE constant you can now add the URL of your library site into the Template Directory setting.
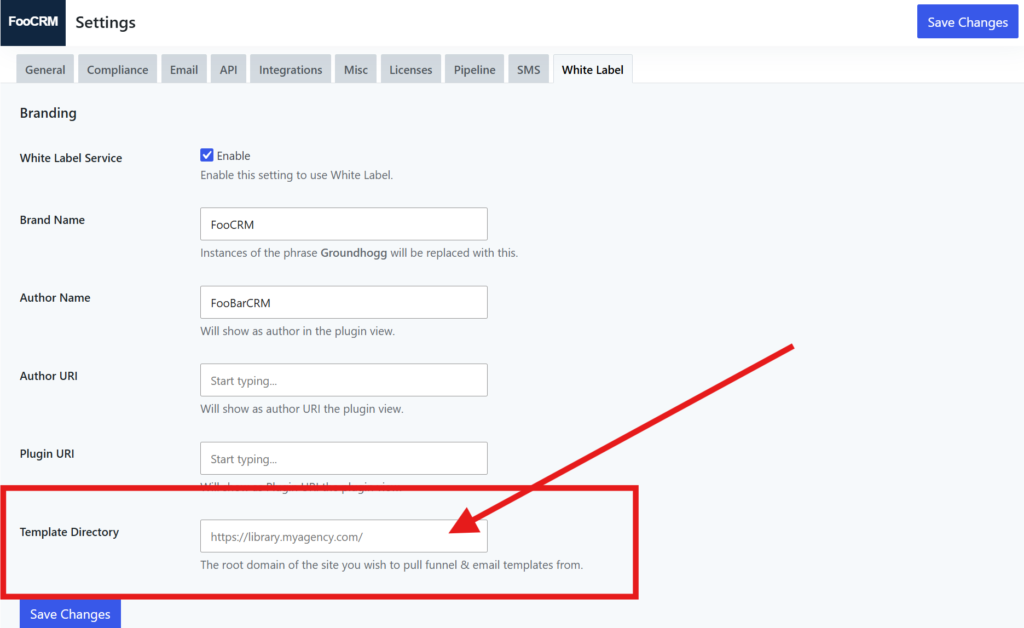
Your white-labeled CRM will now pull templates from your custom library instead of the default library.
Was this helpful?
Let us know if this document answered your question. That’s the only way we can improve.